This Photoshop tutorial shows you how to make those exciting water splashes and add them to photos to really make them pop! Spoiler alert, these are much easier to do that you think, check out the video and see for yourself and then share your water splash effects with the rest of us over at the CAFE Facebook page (join here – it’s safe and free).
We are having a contest for the best water Splashes images over in our CAFE Facebook page (join here – it’s safe and free). Its free to enter and you could win a free premium PhotoshopCAFE tutorial.
A while back, I was fortunate to have one of my photographs featured on the cover of Photoshop User Magazine. (for a cover story i wrote).
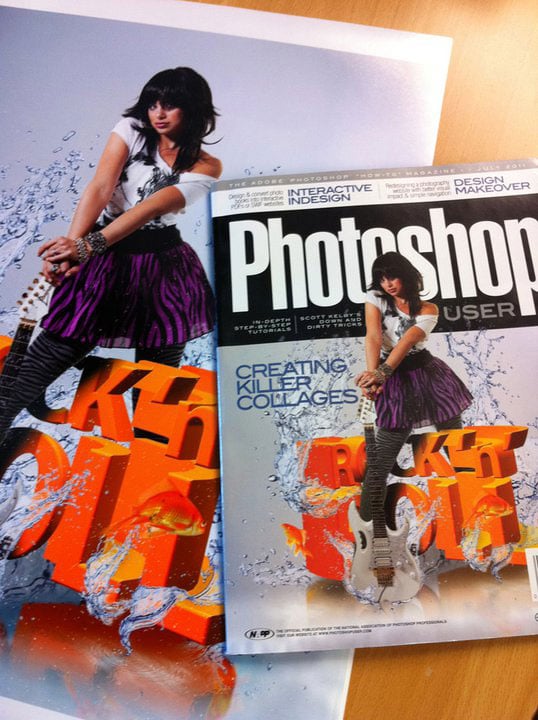
This was a photo of model Llana that I captured in my studio.

I then Added the water splash and 3D effect for a tutorial that I wrote in the magazine.

Because this effect was so well received, I decided to make a quick Photoshop tutorial here at PhotoshopCAFE. This tutorial gets directly to the point and I show you exactly how I make my water splash effects. Check out the video above and read the text below to see all the steps.
For this tutorial, rather than use my own photos, I decided to grab a couple of images from Adobe stock: This way you can grab them yourself and follow along.
Become an Adobe Stock Contributor: https://adobe.ly/2qdDFRH
10 free images from Adobe Stock https://adobe.ly/2pnpTe4
I combined the dancer with the background, (How to combine a person with a background tutorial)

Then we really make it pop with the water splashes (watch the video tutorial at the top of the page)
In this case, we are going to make brushes out of the splashes. The advantage to this method is that its really easy to reuse the splashes for other things and it’s really fast to work. The disadvantage is that you don’t get to keep all the original colors. (I’ll be doing a second tutorial next week that shows another method that preserves the colors).
a: Open your image that contains your splashes, here is the stock photo, linked above.
b: Make a selection around it with the rectangular marquee tool.
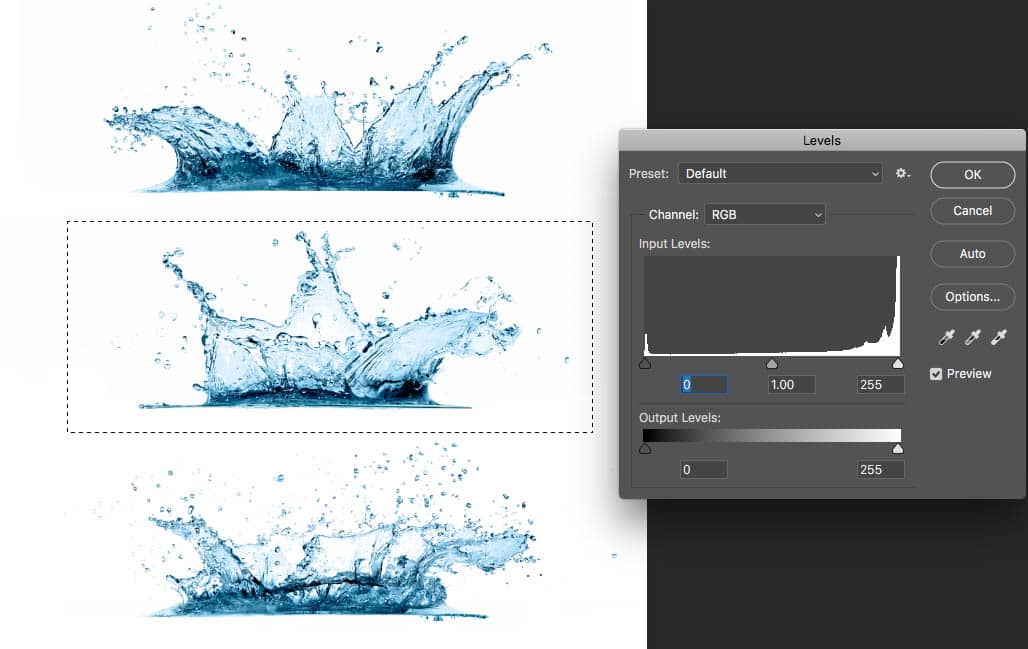
c: (Optional) If the image lacks contrast, then press Cmd/Ctrl+L for levels. Move the Black triangle to the right

d: Choose edit>define Brush
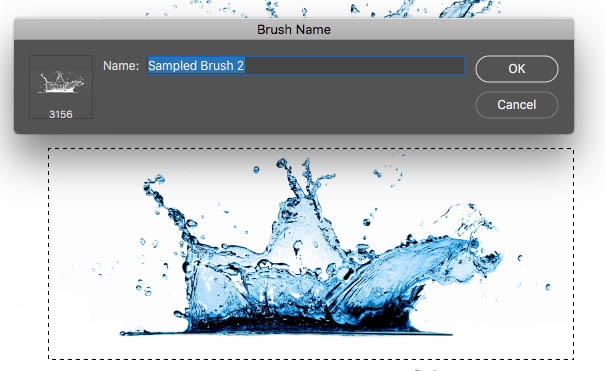
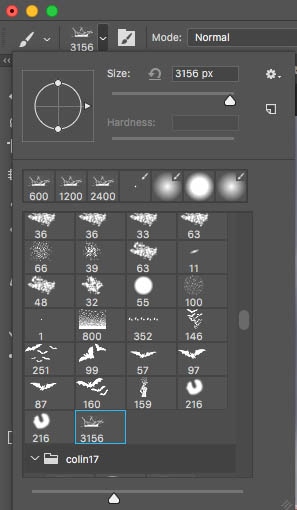
Choose the bush tool from the toolbar and select your new brush. Tap on your page to paint with the brush. Pressing the [ or ] keys will change the brush size.
Here are some painting tests to see it works. Continue these steps with different splashes to make a series of brushes.
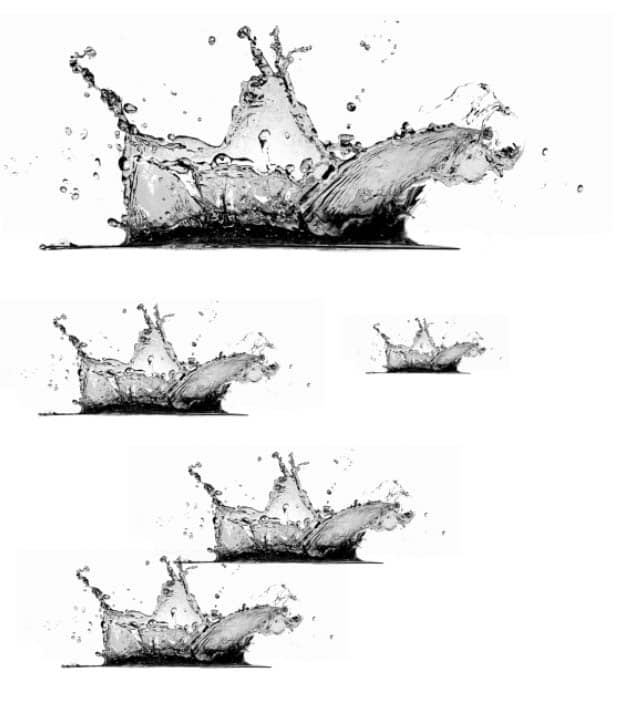
a. Select the brush tool (b key)
b. Choose white as your foreground color, so we will make white water.

c. Choose the Splash brush to paint with.
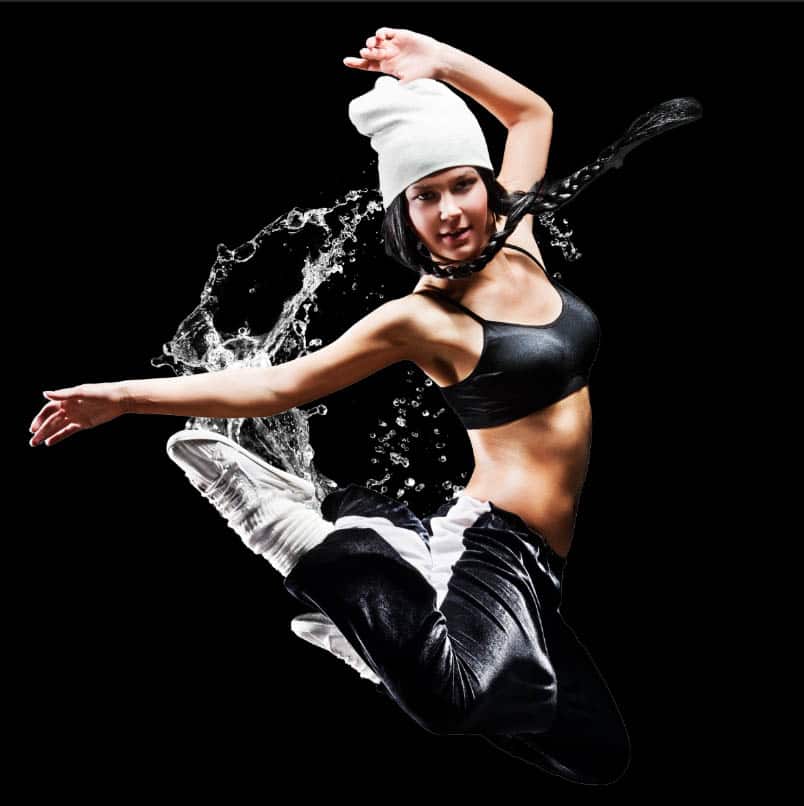
d. create a new layer to paint on. In this case I made the layer behind the dancer image.
c. Resize the brush [ or ] keys. With Opacity turned up to 100, I tapped once with the brush to create the water.
d. Feel free to reposition, rotate, and scale the water. This is why its on a new layer.

Here I have made the background black, just so you can see the water better.
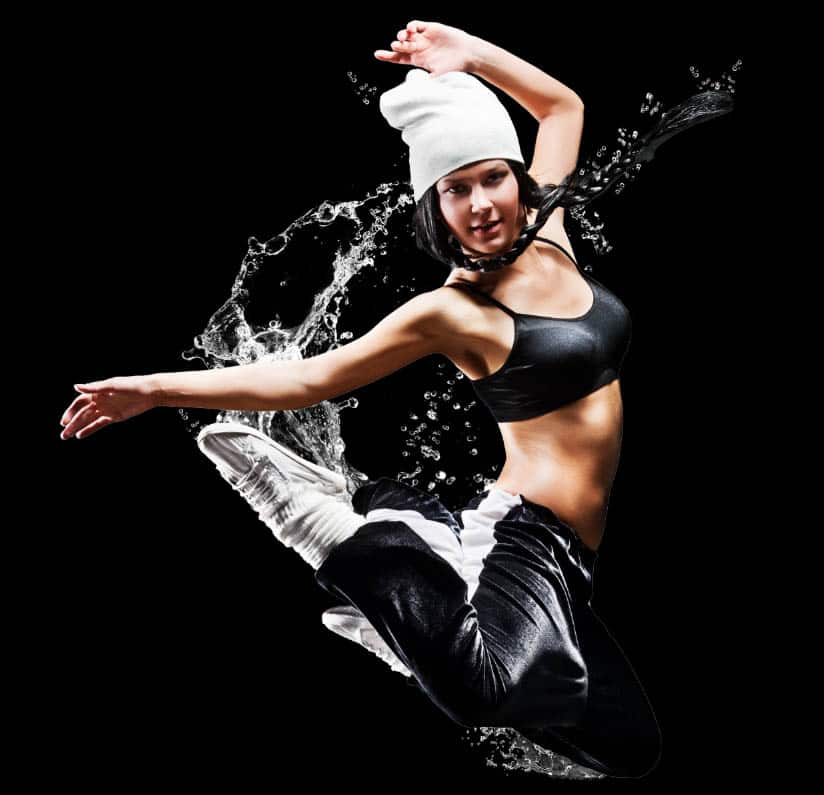
This time I chose another brush and added more splashes on a new layer.
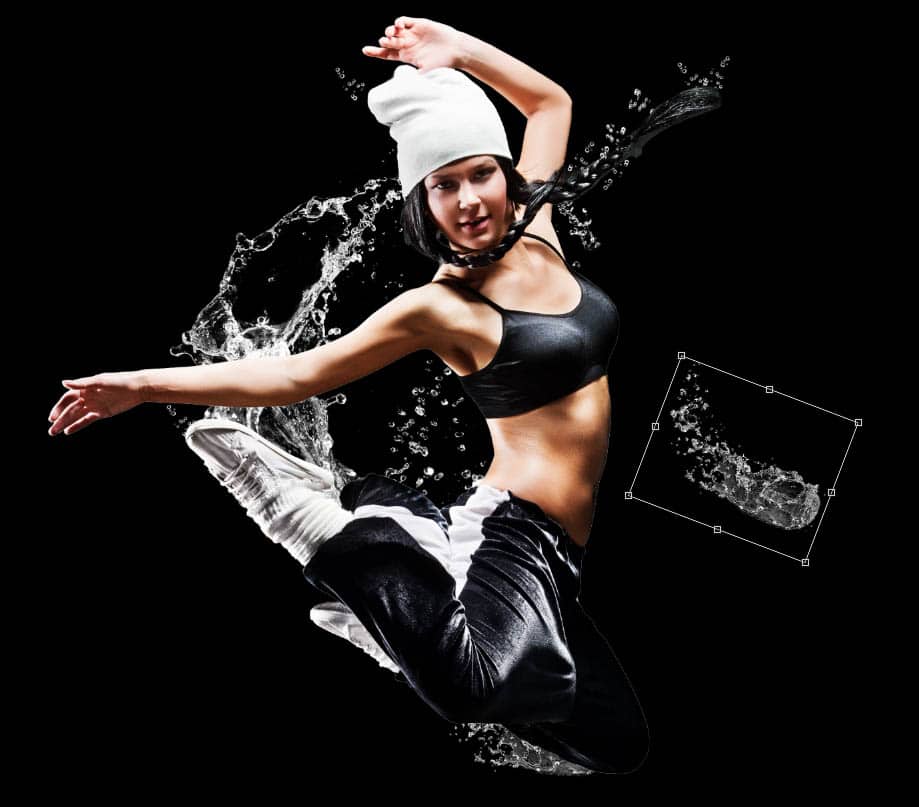
To manipulate splashes, choose a new layer and tap with another brush. Press Ctrl/Cmd+T for free transform. Drag around the bounding box to scale, rotate and stretch the water into the position you like.
Keep adding more splashes, all of these are behind our dancer.
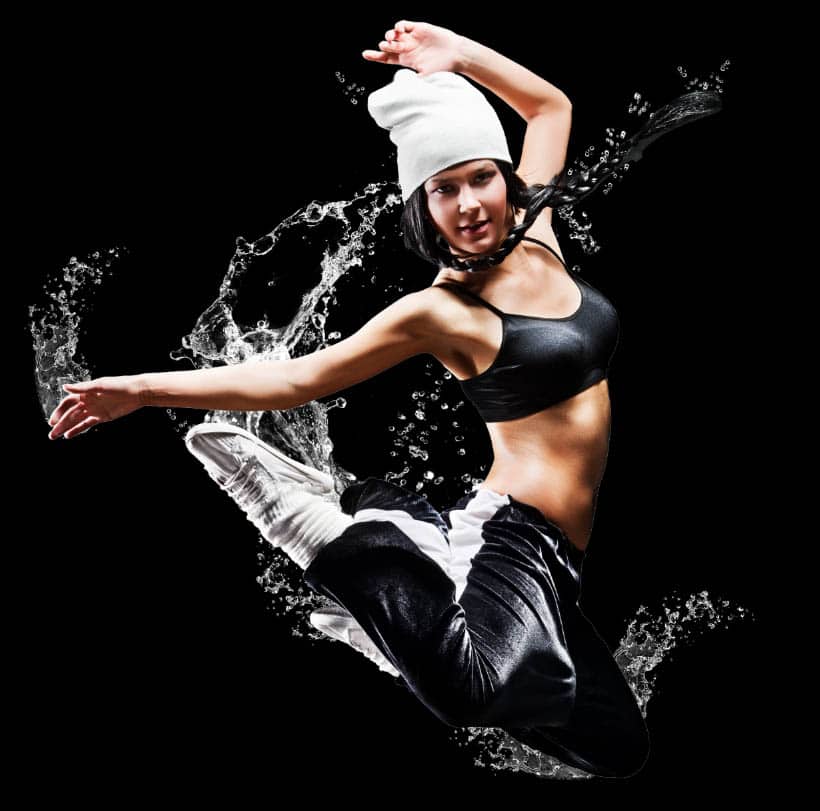
Also, add some splashes in front of our dancer and manipulate the water to do what you want it to do. (Feel free to use liquify too).
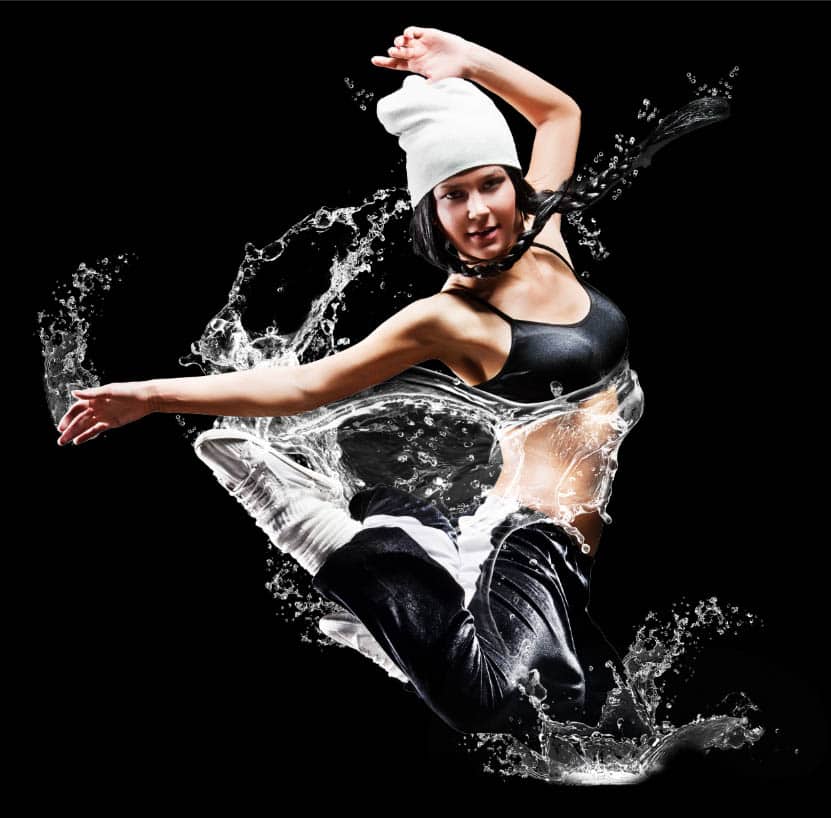
And this is what it looks like when I show the original background (watch the video at the top to see all the painting in real time).
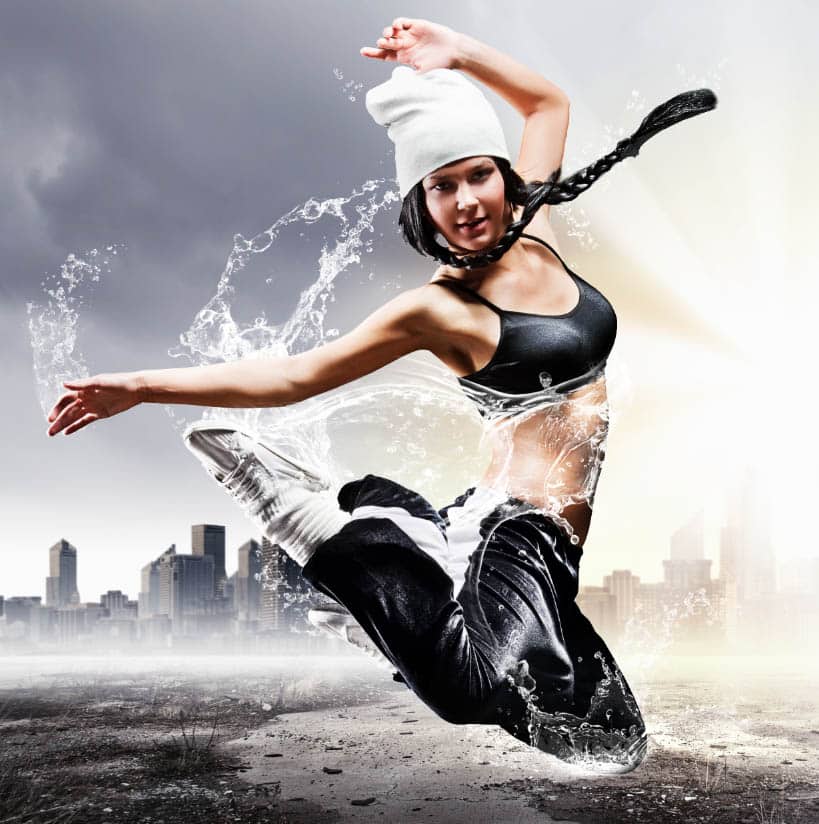
Each splash is on its own layer. This is what the layers panel looks like.

Here is the final result where I have pushed the colors a little bit using Camera Raw. (lightroom settings are identical)
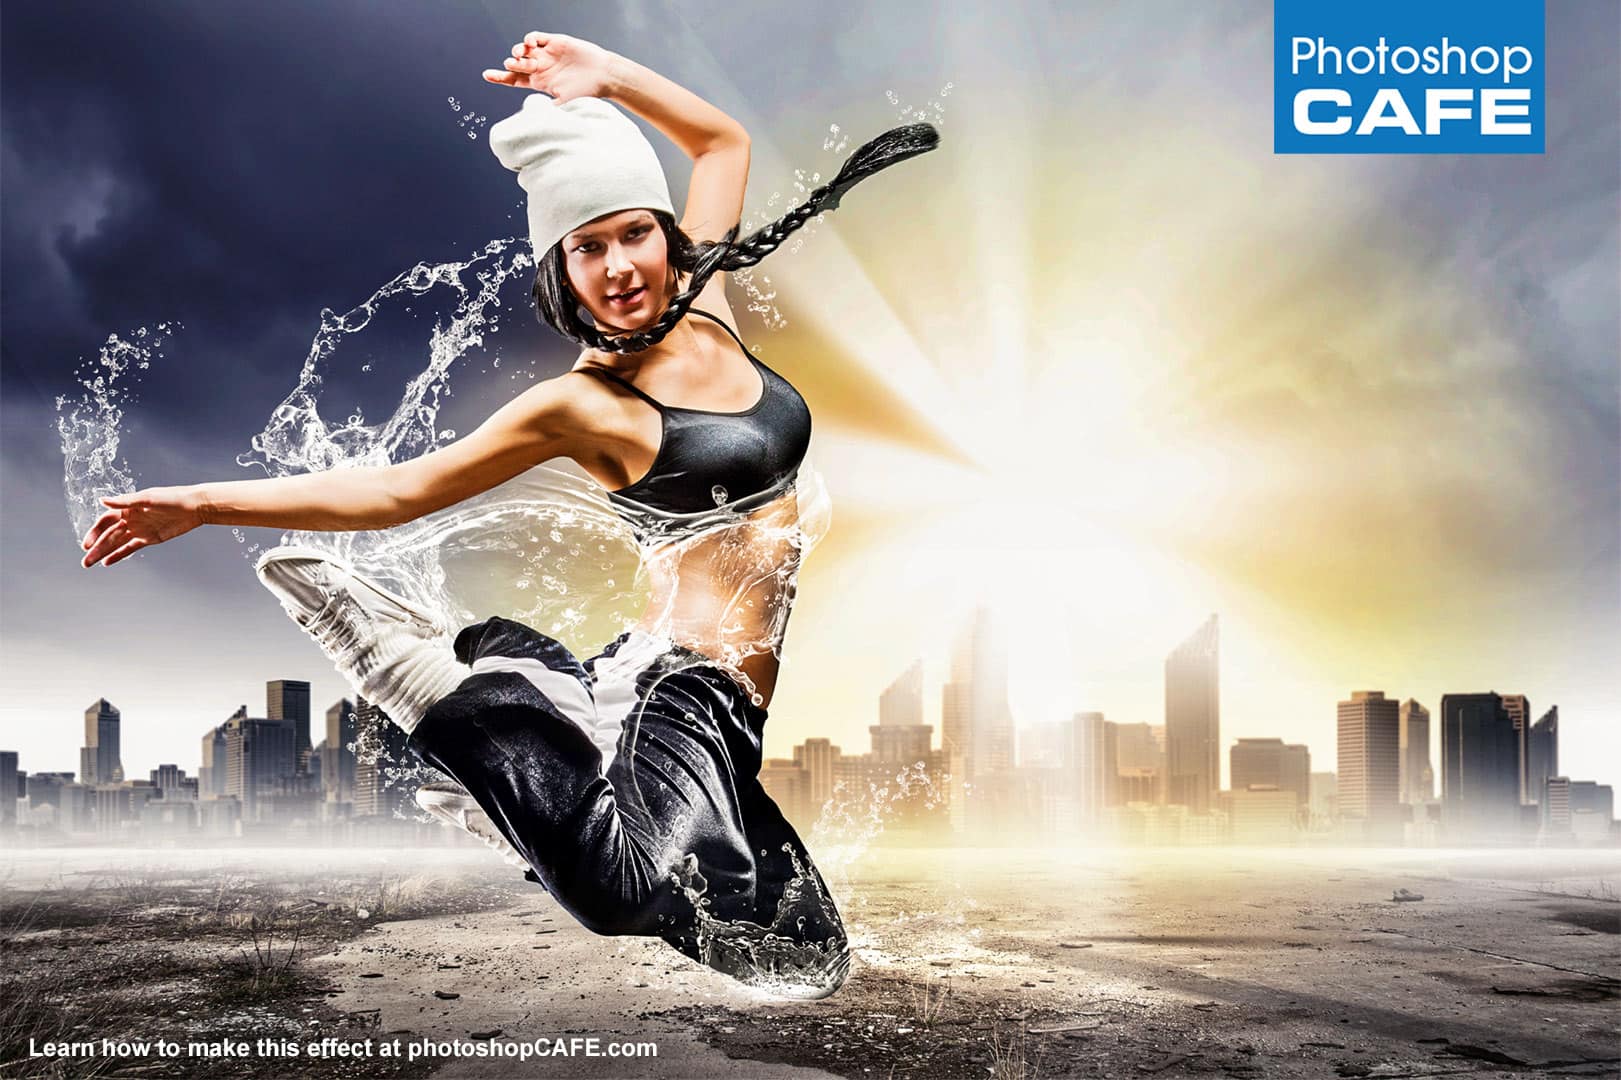
This is the same process used to make the funky colored splashes like you see here. (to do this, I just selected the water layers into group and applied a colored gradient over the top
1. Select all the water layers in the layers panel
2. Press Cmd/Ctrl+G tp put them in a group, or Layer>merge layers (Ctrl/cmd+E) to make a single layer out of all the splashes.
3. Lock transparency in the layers panel
4. Apply a colored gradient and tune the colors.

Thanks for hanging out with us here at the CAFE
Don’t forget to comment and subscribe to our newsletter (its free)
Colin
Layer Blending Modes. Free eBook by Colin Smith
Grab your free PDF ebook right now. We were going to sell this for $9.99, but figured we would give it away instead and see what happens 🙂
https://photoshopcafe.com/blendmodeebook
text
Also, check out our ultimate guide to layer blending modes in Photoshop. All the blend modes explained and practical ideas to use them, tutorials, explanations and a video overview.
This site uses Akismet to reduce spam. Learn how your comment data is processed.
Time-lapse photography is enjoying a spike in popularity. In this tutorial, you will learn what time-lapse is, how to shoot...
Use the hidden photographic toning presets in Photoshop, for pro color grading with gradient maps. ...
This Photoshop tutorial shows you all the steps to make a watermark from a signature. How to make the signature...

I have enjoyed your tutorials for many years now and they have been inspirational to think more creatively with photoshop I have the last version cs5 that was possible to buy . Now there is no way to have upgrades without subscribing for a fee to all the services of Photoshop. Anyway I’m not a graphic artist but enjoy sometimes the doing some fun with photoshop. A last note thank you for your generosity with offering thise book on layers blend. I will try to learn something new. Cheers
Hi Colin,
Excellent tutorial!! Yes, I would love to see how to extract a transparent object!!
Dennis
Thanks so much! You’re a wonderful instructor and the tutorials are always informative. I especially liked this one!
This is fantastic. I’ve never used brushes like this but can’t wait to do so. Thanks Colin!
Hi Colin,
Loved the tutorial. I’m very interested in learning how to extract a transparent object and make it into a brush. The possibilities are endless! Love the step by step instructions with the video.
Thanks Colin, very informative and fun.
This is a brilliant and simple way to get some special effects happening. Thank you. That extra tip, by the way I am using constantly now and it is excellent!
Thank you so much for sharing great tutorial. This tutorial really helpful. Please keep up.
Hi colin
I love your editorials and watch them all. I am very sad on this one because when I tried to save the water splash to brush the brush is not highlighted and wont let me do the next step. One other thing I cant do, is to have my pictures on the right side named the way you do please help me to learn your professional standards~! My pictures are all up top…..
Thanks Colin: I had no idea brushes were so easy to make. Had a blast with your water TT
Your free ebook won’t download. Stuck at 50% for 20 minutes. I gave up.
check your email, just sent it to you
Loved the tutorial! Next time I will try to add some water splashes to one of my pictures!
Hi colin,
This is fantastic tutorial.I’m very interested in learning how to extract a transparent object and make it into a brush.
I will try to learn something new. Cheers
Hi colin, I think this is powerfull tutorial. thanks
Oh my God!!! God Bless you!
I’m a great graphics designer when we talk of Corel draw.. but Corel had it’s limitations… I needed this particular splash for a project… Thanks for the help bro.. Thanks!
Never made a brush before – so that was cool! Can’t wait to try it on my own!
this is a great tutorial, thanks for creating and sharing.