If you have been using Photoshop for a while, or you are brand new, I want to present 5 things you really should know. This will save you so much time over the long run. Of course there are more than 5, (and I cover a lot of those in our tips section), but there 5 are bread and butter.
The welcome screen is useful, we can visually open existing images or easily create new documents. Click the PS icon in the top left to go into Photoshop. But not everyone is a fan. I will show you how to hide it.
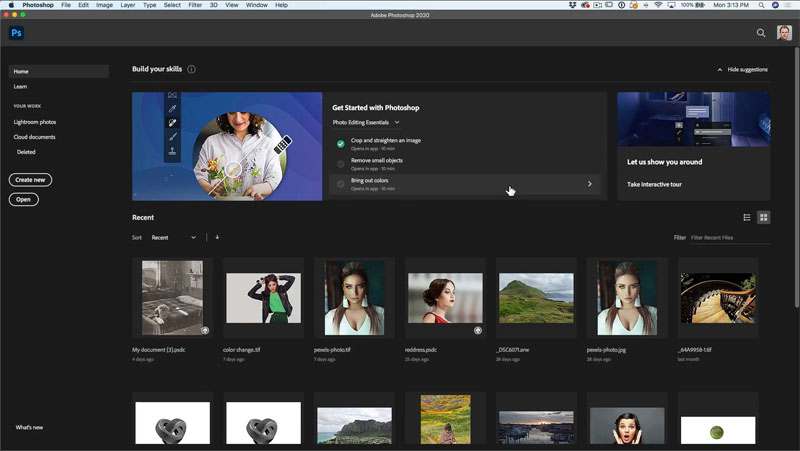
Its easy to get rid of. Go under preferences>general. See the option for auto show, the home screen. Turn that off now.
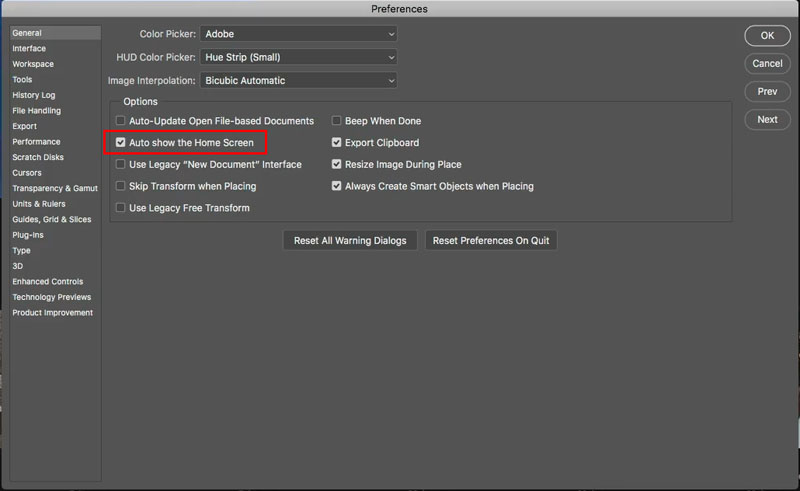
When you relaunch Photoshop, we don’t have to see that screen anymore.
I have seen too many people waste too much time filling in Photoshop. These tips are worth committing to memory
One of the things we do a lot in Photoshop is fill. I’m going to show you several ways of filling shapes and objects.

One of the ways is to use the paint bucket tool, which, to be honest, I almost never use (The following tips will show you why) . But its under the gradient you’ll see this paint bucket.

![]()
Using this target as an example (3 rings) Choose a red color. Click with the paint bucket, to fill one shape at a time.


If you want to fill all the pixels on a layer at once, turn off contiguous and then just click to fill all the shapes at once,


What if you want to preserve the transparency? All we need to do is add the shift key,
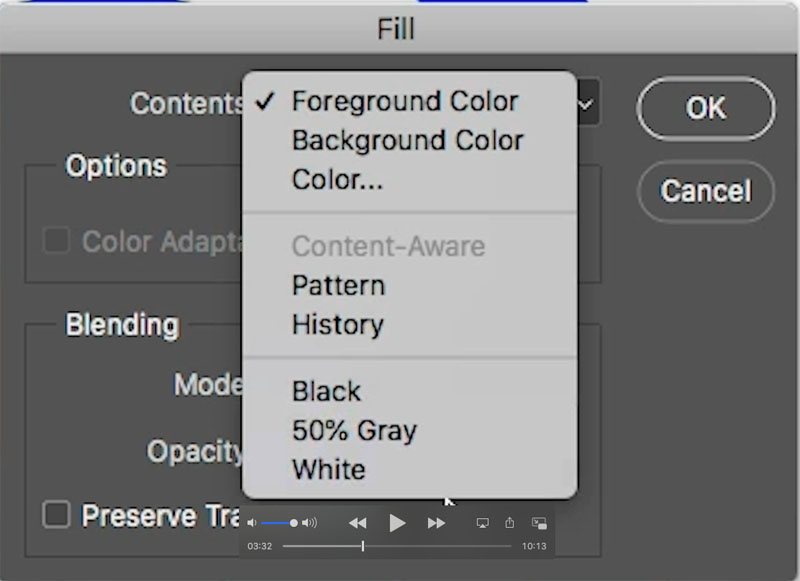
If you want to quickly get to the fill dialog box, press shift+ delete or shift backspace on windows.
We can easily fill with with black, white, gray, a color, or Content Aware Fill or even a pattern.
Maybe you want to do some Levels adjustments, we will use this as an example.
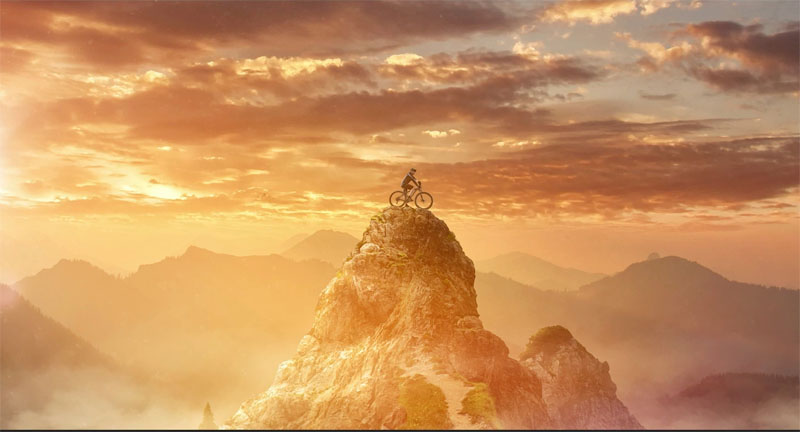
Create a levels adjustment layer.
Move the triangles to the left to turn up the brightness.
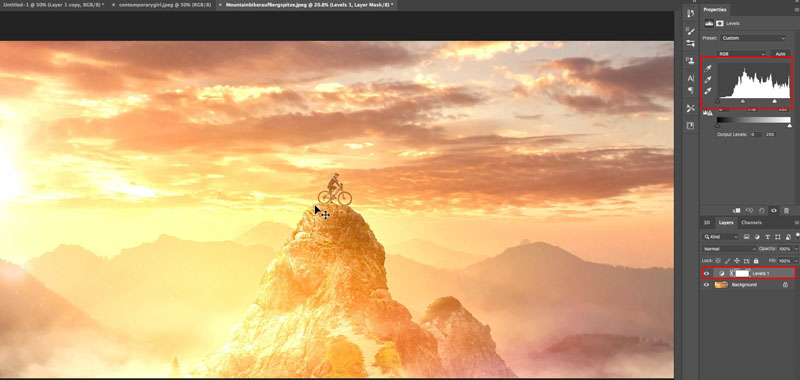
But I don’t want to apply it to the whole image. I just want to apply it to a little bit on this mountain. We want to invert the layer mask.
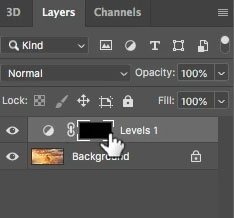
Click on the layer mask and press Ctrl/Cmd+I. The layer mask now turns Black means it’s completely hidden.
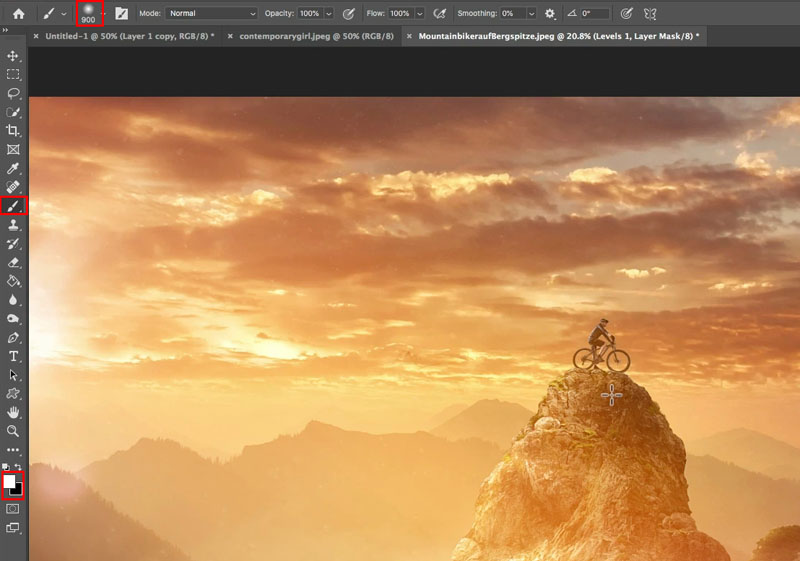
Choose a brush, select white as the forground color and paint on the mask. The adjustment is now visibale.

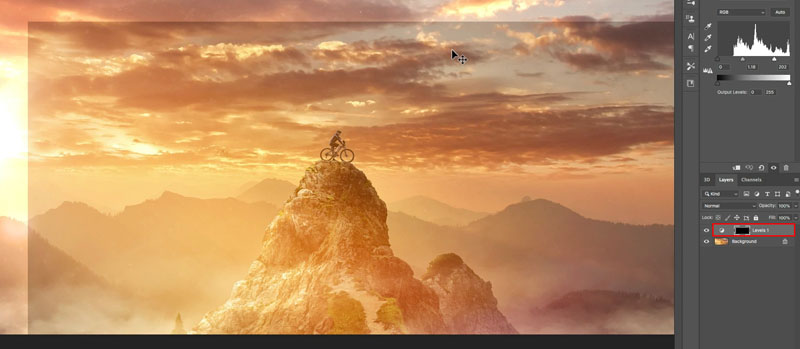
There is a good reason to Invert the mask and not fill with black (the video shows this).
A lot of people, fill the mask with black, rather than inverting it.
Here’s the problem. If you move the mask, we get a visible edge. If you invert you create a black mask instead of taking a white mask and just filling the visible area.
So always invert the mask to avoid these edges.
Go under Photoshop preferences and you’ll see all the different preferences and under one of these you’ll see one called scratch disks.
If you have more than one drive, you’ll see different drives. What you want to do is take this little checkmark and turn it on to the fastest drive that you have.
Uncheck the slower drives.
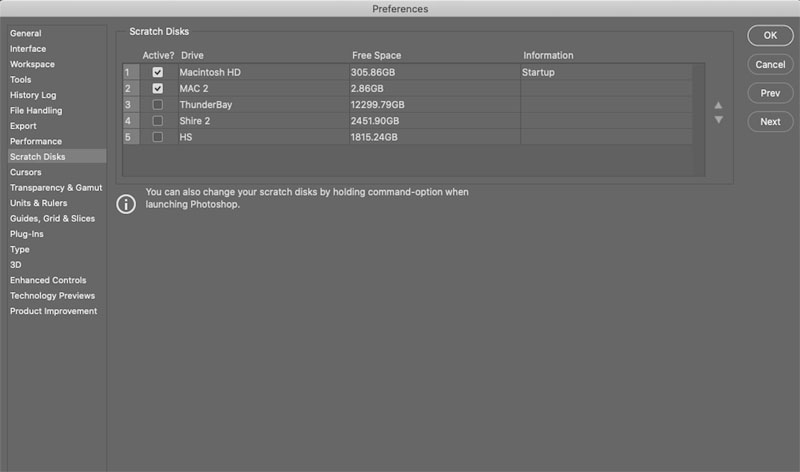
Photoshop uses RAM, (Random access memory). It’s very fast, but eventually Photoshop is going to run out of RAM and starts to write to the slower hard drive. Your hard drive now is used as RAM, which is called scratch disk.
Sometimes you can use 10 times the amount of scratch disk space as your document size, so you can see why a slow drive or a cluttered drive can really slow things down.
If you have a faster drive such as the MvMe or an SSD drive, It’s a faster drive, which means that Photoshop can work faster if it uses these drives. By the way, if you ever see a message that says this is full, you can free up memory, just go up under edit>purge >all. And that will purge everything out of memory and free it up.
Clipping groups are a non-destructive way of you putting objects inside other objects.
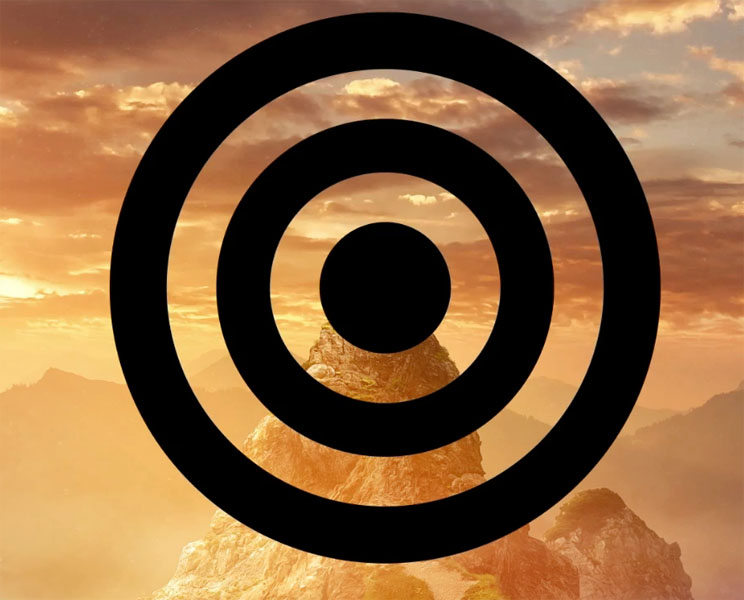
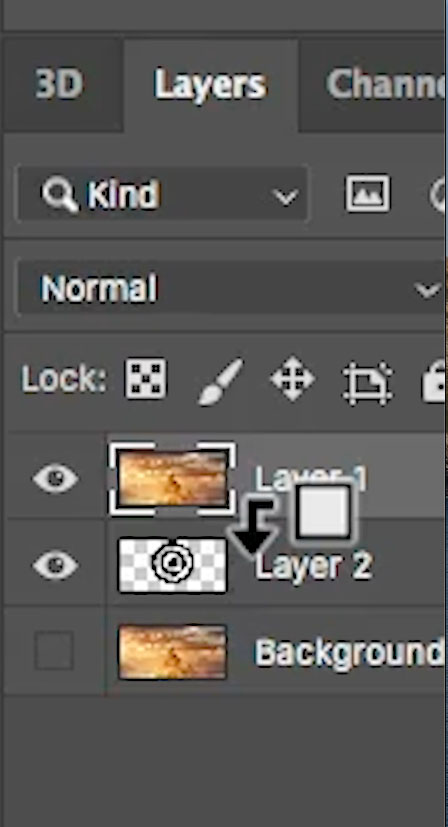
When you have an image and you want to put it inside the transparency of the layer underneath. Go between the two layers, hold down the alt/option key, you’ll see a little arrow.
Click and now it clips that layer within the other layer.
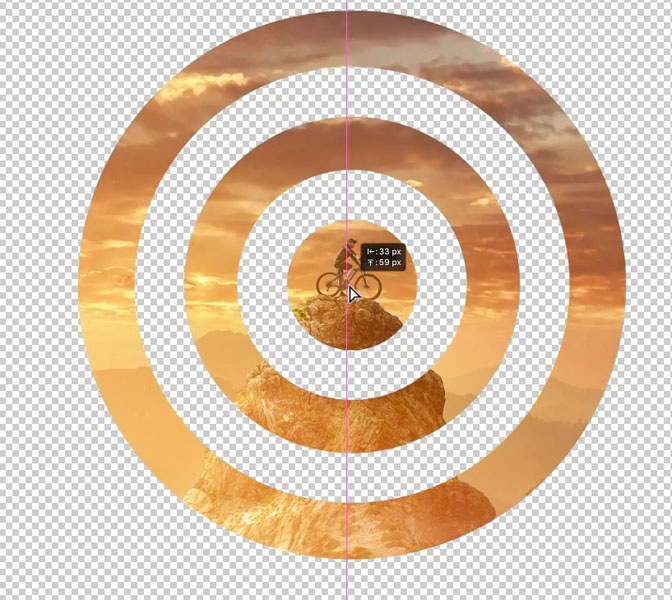
The other advantage is you can move it around, it’s nondestructive. So you can reposition the top layer easily without losing anything.
So I hope you found these five tips useful. Let me know in the comments!
BTW, if you came here from our you youtube channel, youtube no longer sends email notifications, so join our mailing list, so you know when I upload new tutorials!
Browse our hundreds of other free tutorials here, or search for what you are looking for in the search at the top of the page.
You can also browse by topics in the free tutorials menu.
If you are ready to get serious about Photoshop, see our full length courses here
PS Don’t forget to join our mailing list and follow me on Social Media>
(Ive been posting some fun Instagram and Facebook Stories lately)
Great to see you here at the CAFE,
Colin
This site uses Akismet to reduce spam. Learn how your comment data is processed.
How to brighten the shadows in a photo in Photoshop using an easy Parametric curves trick. Make all your photos...
5 hidden Photoshop tips for prefect selections and clean cutouts with crisp edges. Cut out photos, remove backgrounds in Photoshop...
How to make a realistic looking shadow in Photoshop. This photoshop tutorial shows how to cast a shadow, Colin Smith's...

I would love to smash the “Like” Box, but I have yet to find it. Been watching your tutorials etc., for a long period of time and I cannot find a “Like” button or box.
Ed
The like button is on youtube 🙂
I keep forgetting that layer inversion trick which I learned from you, Colin. Thanks for keeping these online.
Love the clipping groups – so easy
Colin, I ALWAYS learn something from your videos! Thanks for being a sharing soul.
Loved this video. Short and sweet. I knew 2 or 3 of the tips but had forgotten them.
Colin, a million voices ain’t enough to echo my gratitude for the wonderful tutorials. You are an icon and very much a living legend, I tip my hat for you.
I’m so thrilled to be able to watch your videos…. 99% of the time I can follow you without any problem at all… But let’s look at the scratch disk portion of this video again…. For the life of me, I can’t understand how you when from the first screen with just the hard drive disk listed and checked and the next part where you suddenly show multiple hard dives. The best I can do is to show two of my drives and not the two additional drives that I have attached to my iMac (using Photoshop 2021). Perhaps that is because both of those were formated with ExFAT so that I can use with my iMac and with a PC. Any suggestions?
I took the screen capture from my desktop computer for the 2nd (which has multiple drives) , because I initially recorded this on a laptop which had no additional drives.
The inverted mask trick is going to save me so much time, thank you!!