Be the first to review “Comic Book Coloring in Adobe Photoshop” Cancel reply
This site uses Akismet to reduce spam. Learn how your comment data is processed.

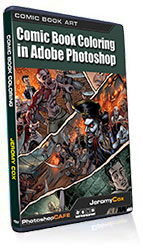
If you have ever looked at comic books like Batman, Spider-Man and Superman and wished you could create the same type of look, you are in luck! Meet your new teacher, the man who has worked on these legendary comic books and more!
In this video, one of today’s leading forces in the comic book world, Jeromy Cox reveals his workflow and techniques as a professional colorist. Watch and follow along as Jeromy shows you the techniques and explains the principles and philosophy that have caused him to be so successful in the industry. Not only will you learn the building blocks that will enable your digital painting skills soar, you will also learn how to be efficient with your time in Photoshop.
Jeromy walks you through a complete panel from his original comic book, Vampyrates, start to finish. The base sketch is included, so you can follow along. The high resolution final panel is also available, so you can see all the details.
This video contains around 5 hours of video. The advanced interface allows the user to instantly jump to any of the lessons with complete control over the playback including Full Screen. All the lesson files are included, so you can follow along at your own pace!
Lessons Include
Workflow secrets
Timeless Photoshop techniques
Color theory
How to make a good composition
Cut and gradient technique
Background and midground
Rendering foreground characters
Special effects: Smoke and fire
Special effects: Additional line work
Dramatic lighting
Texturing surfaces
Separating from background
Softer rendering for female subjects
Overview and corrections
Decision making
An introduction from Jeromy Cox. 
Before we start the page, it’s good to take some time to familiarize Jeromy’s work area and what goes into his thought process before he begins a page. 
Additional tools and composition theory are discussed as we begin the project. 
The Cut and Gradient Technique is akin to the traditional method of painting using an airbrush with friskets. Isolating shapes of light as it passes across three dimensional figures and objects. 
Part 2 of the Cut and Gradient Technique 
Using the same Cut and Gradient Technique, we render the mid ground and background in a similar fashion. 
To add more depth, we enhance the separation of the background from the foreground by knocking out line work and add atmosphere to the image by rendering a glow on the fire. 
Knocking out more line work in detail. 
Moving on to the first and second panels, we continue the same process but pay close attention to dramatic lighting. This features the main protagonist. 
We continue the same process but pay close attention to dramatic lighting. This is a comic book about Vampire Pirates, after all. 
Continuing the same process paying close attention to dramatic lighting. 
Learn different techniques to render rock textures. This scenes features some of our protagonists, so we pay more attention to their details. 
Again, knocking out the line work adds depth to the image and makes the background recede. 
This mid ground character is one of our main villains, so we place more attention to detail and render her softer than the rest of her Vampyrate compatriots. 
Near completion, we zoom out to see how the whole page looks and determine which areas are important to improve or fix. 
Jeromy gives some final thoughts and resources for further learning.
This site uses Akismet to reduce spam. Learn how your comment data is processed.
I recieved the CD and i want to thank you for making such great tutorials!
Since I came into contact with your site and tutorials my knowledge is growing by the day, my collegue is getting pretty nervous since I showed him what I can do with photoshop! He is an experienced Photoshop user but I am showing him how to use some of the Photoshops secrets already, thanks to your help.

Reviews
There are no reviews yet.